How to Recover Permanently Deleted Files in Windows 10 & 11 (2026 Guide)
 Written By Rishabh Singh
- Approved By Kuljeet Singh

 Updated on 19 May, 2026
 Min Reading 10 Min

Accidental deletion happens at the worst possible moment – you’re casually cleaning up your desktop, deleting a few files or freeing up space, and it hits you. A file you actually needed is gone! Using Shift + Delete or emptying the Recycle Bin itself make it even worse because in either case the files aren’t just deleted – they’re permanently removed from your system.
The good news is that permanent deletion isn’t necessarily the end of the road. In many cases, the data is still there in the background. But whether you can recover it depends on what happened after deletion – how much the drive (where those files were stored) has been used, the type of storage you’re on, and whether any system feature or backups were in place.
In this guide, we’ll cover both approaches: the built-in options in Windows that can help you recover files without using any software, and the other more effective methods using dedicated recovery tools when there’s no backup to fall back on.
Can Permanently Deleted Files Be Recovered?
Yes, it’s often possible to recover deleted files — though not guaranteed — and the outcome depends on how the data was handled immediately after deletion.
- When you permanently delete a file using Shift + Delete or purge it from the Recycle Bin, Windows doesn’t wipe it instantly
- The OS simply removes the file’s reference from the file system
- The space occupied by the deleted files is marked as available for storing new data
At this stage, the file you deleted is not visible in File Explorer anymore… but the underlying data still resides within the storage disk and recovery is possible until it gets overwritten. Over time new files are saved, and Windows may need to overwrite that space, replacing the original data and making it unrecoverable. The thing which matters the most here is timing—even if no backup is available, a data recovery software can still scan the drive and retrieve the deleted files.
The Role of Storage in Recovery: HDD vs SSD
Storage type also plays a key role. Traditional HDDs usually retain deleted data until it gets overwritten. This means the chances of recovery are higher, and more so if you act quick. SSD recovery is a different story altogether. Most modern SSDs use the TRIM feature that aggressively clears out deleted data in the background to improve drive performance. When TRIM is running, it permanently erases the data at the hardware level, making recovery very hard.
That said, recovery may still work if:
- TRIM hasn’t run yet
- The SSD was disconnected immediately after deletion
- The system hasn’t had time to process cleanup
What to Do Immediately after Deleting Files?
Once you realize data is missing, your next step is crucial. Certain actions can make or break your chance of recovery.
- Stop using the affected drive—do not write new files or installing recovery software on it
- When you do recover something, save it to a different disk or USB stick
- Running Disk optimization or cleanup process can overwrite deleted files
- If the drive is external, remove it safely. If it’s an internal drive, simply stop using the computer except to run recovery
Quick Comparison: Which Recovery Method Works Best?
|
Methods |
Works Without Backup |
Success Rate |
Best For |
|
Data Recovery Software |
Yes |
High (if not overwritten) |
Permanently deleted files with no backup |
|
Windows File Recovery (WFR) |
Yes |
Medium-High |
Advanced users comfortable with command line |
|
File History Backup |
No |
Very High |
Files backed up via Windows File History |
|
Previous Versions (Shadow Copies) |
No |
Medium-High |
Files with restore points enabled |
|
Backup & Restore (Windows) |
No |
Very High |
System-level or scheduled backups |
|
Cloud Backup (OneDrive, Google Drive, etc.) |
No |
Very High |
Files synced to cloud storage |
|
Command Prompt (CHKDSK/AATRIB) |
Yes |
Low-Medium |
Recovering hidden or system-level file issues (not true deletion) |
6 Methods to Recover Permanently Deleted files in Windows (With & Without Software)
A permanently deleted file isn’t always gone for good. If you’re lucky, the data still exists on the drive, just no longer visible to Windows. The key is to choose the right recovery method based on your situation.
Before jumping into recovery, take a moment to quickly check if the files are actually deleted –sometimes files are just misplaced rather than lost. They could be in a hidden folder. Use File Explorer search (by name or file type) and enable hidden items.
Suggested Read: How to Recover Deleted Data From Empty Recycle Bin
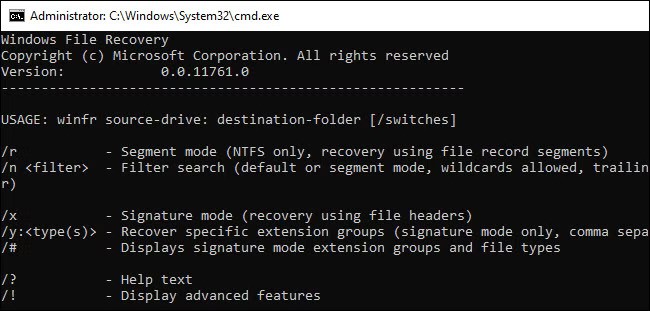
Method 1: Use Windows File Recovery (Command Line)
Windows File Recovery is a free tool by Microsoft to recover deleted files when no backup exists. It scans the drive directly and attempts to pull back deleted files but the catch is that it's command-line only and requires sound technical expertise, so not ideal for beginners. Windows File Recovery offers two different modes depending on your file system and recovery scenario:
Regular Mode: Only supports NTFS file system
Extensive Mode: Ideal for FAT32 or exFAT drives, older deletion, formatted drive, or corrupted NTFS volumes
It works on Windows 10 (2004 and later) and Windows 11. Here’s the workflow:
- Download and install Windows File Recovery from the Microsoft Store
- Open it. It'll launch as a Command Prompt window
- Use this basic command structure: winfr source-drive: destination-drive: [/mode] [/switches]
- Let the scan run
- Once done, check your destination folder for recovered files
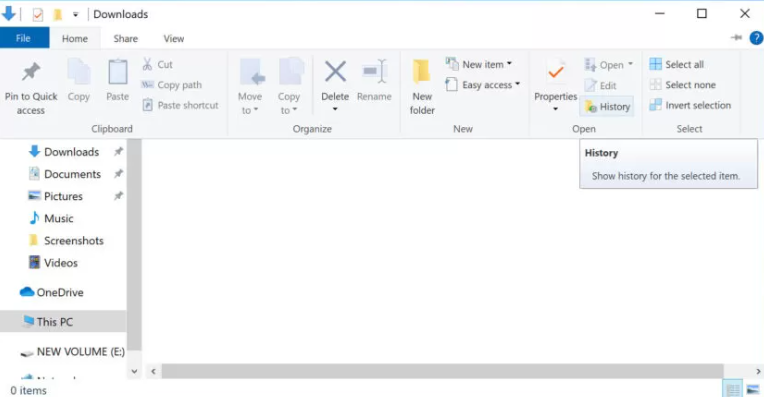
Method 2: Restore from File History Backup
File History is a Windows backup feature which can restore deleted files… including those that are no longer available in the Recycle Bin. It creates automatic backups of important locations like docs, pictures, videos, desktop, etc. But it works only if File History was enabled before the files were lost.
- Launch File Explorer and go to the folder where your files were originally saved
- Click the Home tab and then the History button
- Navigate using arrow keys to search for the files
- Select the files you want to recover
- Click Restore to the move the files to their original location
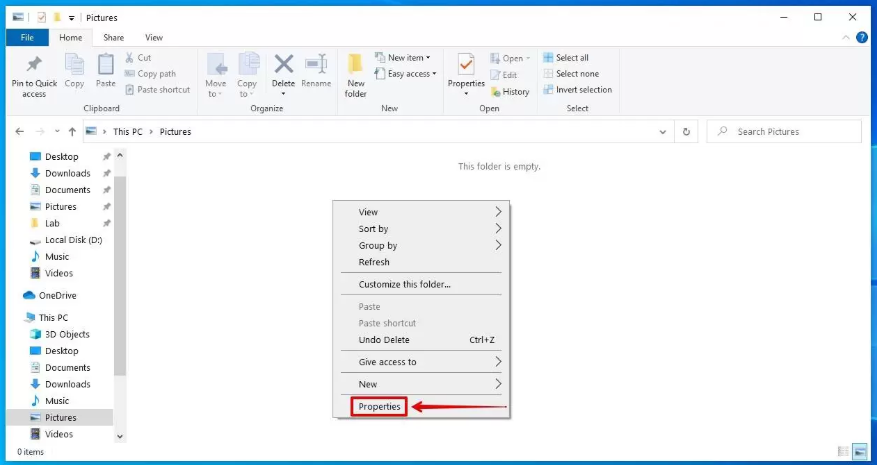
Method 3: Restore Using Previous Versions (Shadow Copies)
The System Protection feature allows Windows to take automatic snapshots of your files & folders which are saved in the background and can be used to restore files to an earlier state – even if they've been permanently deleted. This method works independently of File History and doesn't require an external backup drive. But it only works if System Protection was already enabled on the affected drive before the files were lost.
Important: Configuring Shadow Copies via System Protection is fully supported only on Windows 10/11 Pro, Enterprise, and Education. Windows Home users have very limited or no GUI access to this feature.
- In File Explorer, find the folder or drive that stored the deleted file
- Right-click the folder and select Properties
- Click Previous Versions tab
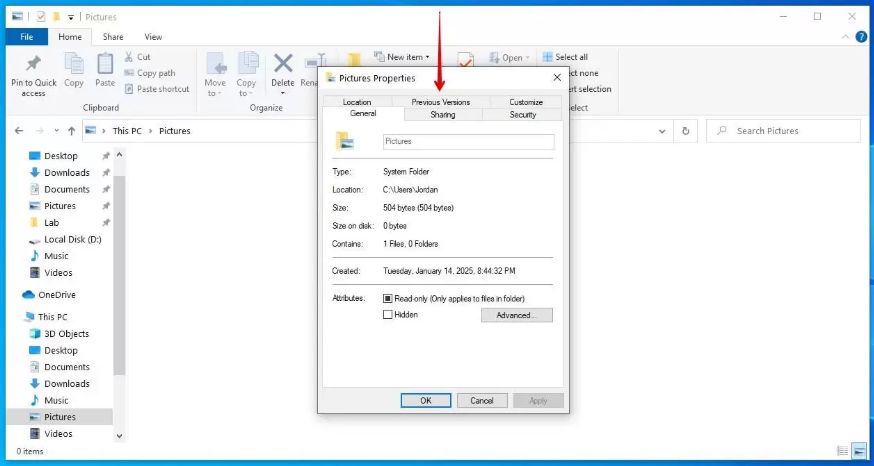
- Select the version you want to retrieve, and click Restore
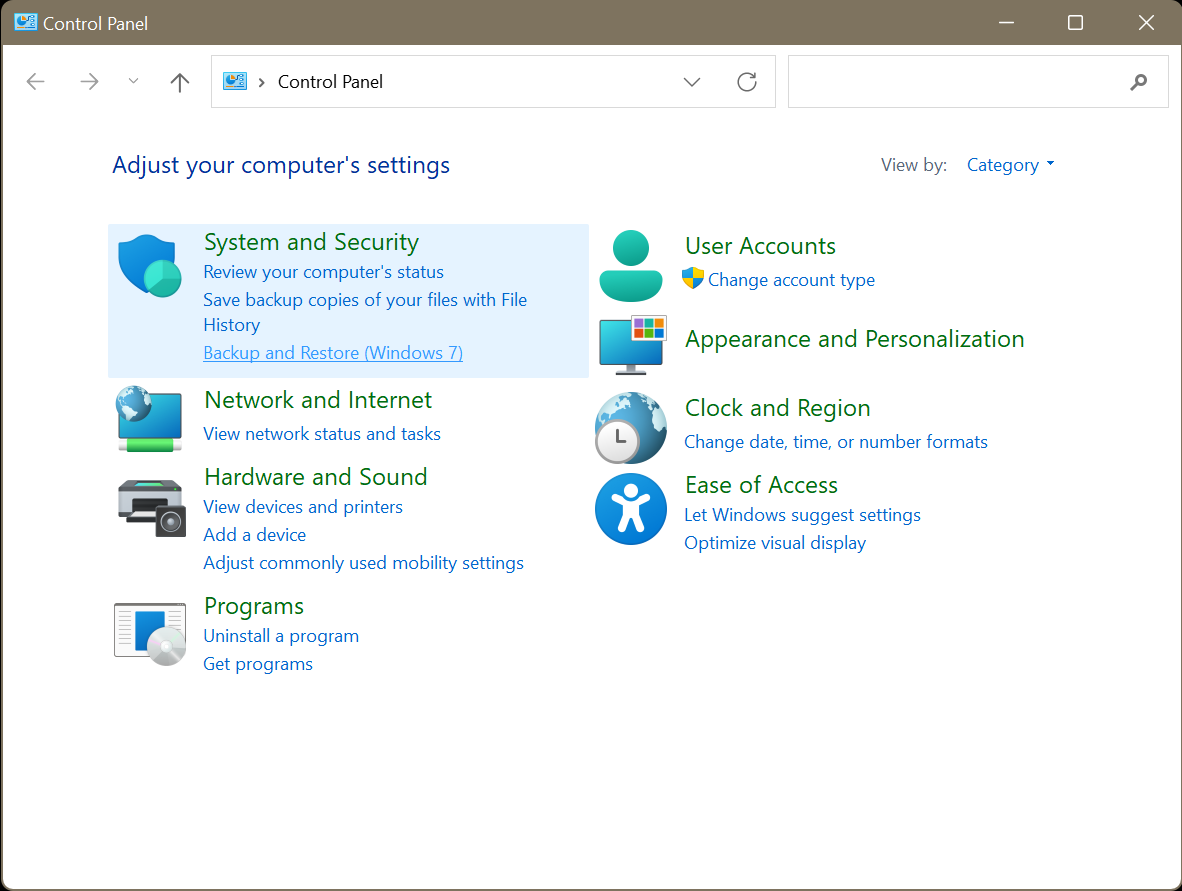
Method 4: Use Backup & Restore (Windows 7)
The (Windows 7) in the label is just legacy branding, Backup & Restore feature is still available in both Windows 10 & 11, and works just as well. If you had previously set it up to create full or incremental backups of your system, you can use it to recover lost files from those saved backup images. It's a reliable option when available – but like the methods above, it only works if a backup was created before the files were deleted.
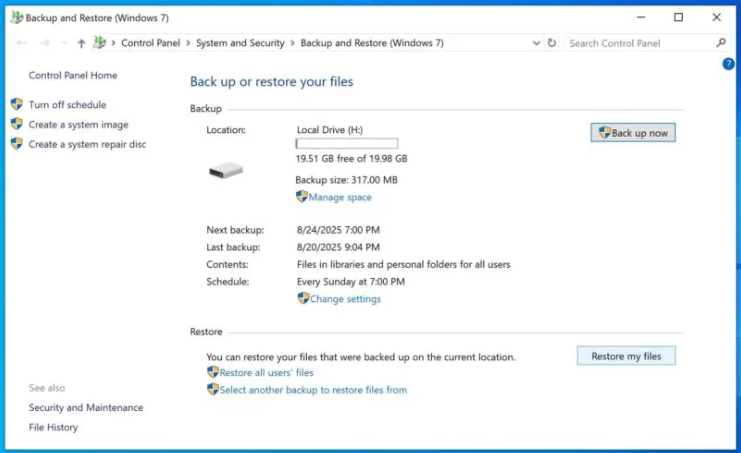
- Go to Control Panel > System and Security > Backup and Restore (Windows 7)
- Click Restore my files
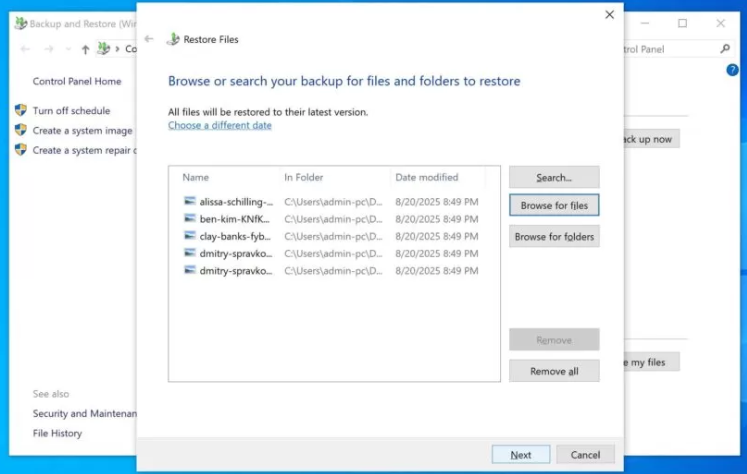
- Click Browse for files
- Select the files you want and click Next
- Choose the location where you want to move the files and click Restore
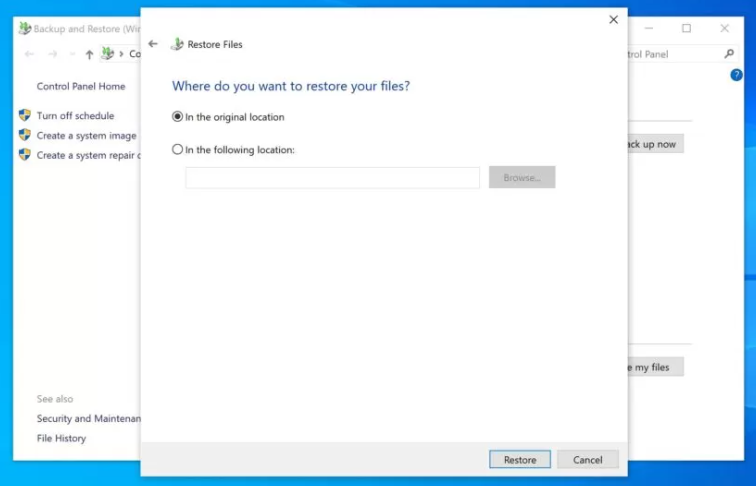
- Click Finish to confirm
Method 5: Check Cloud Backup
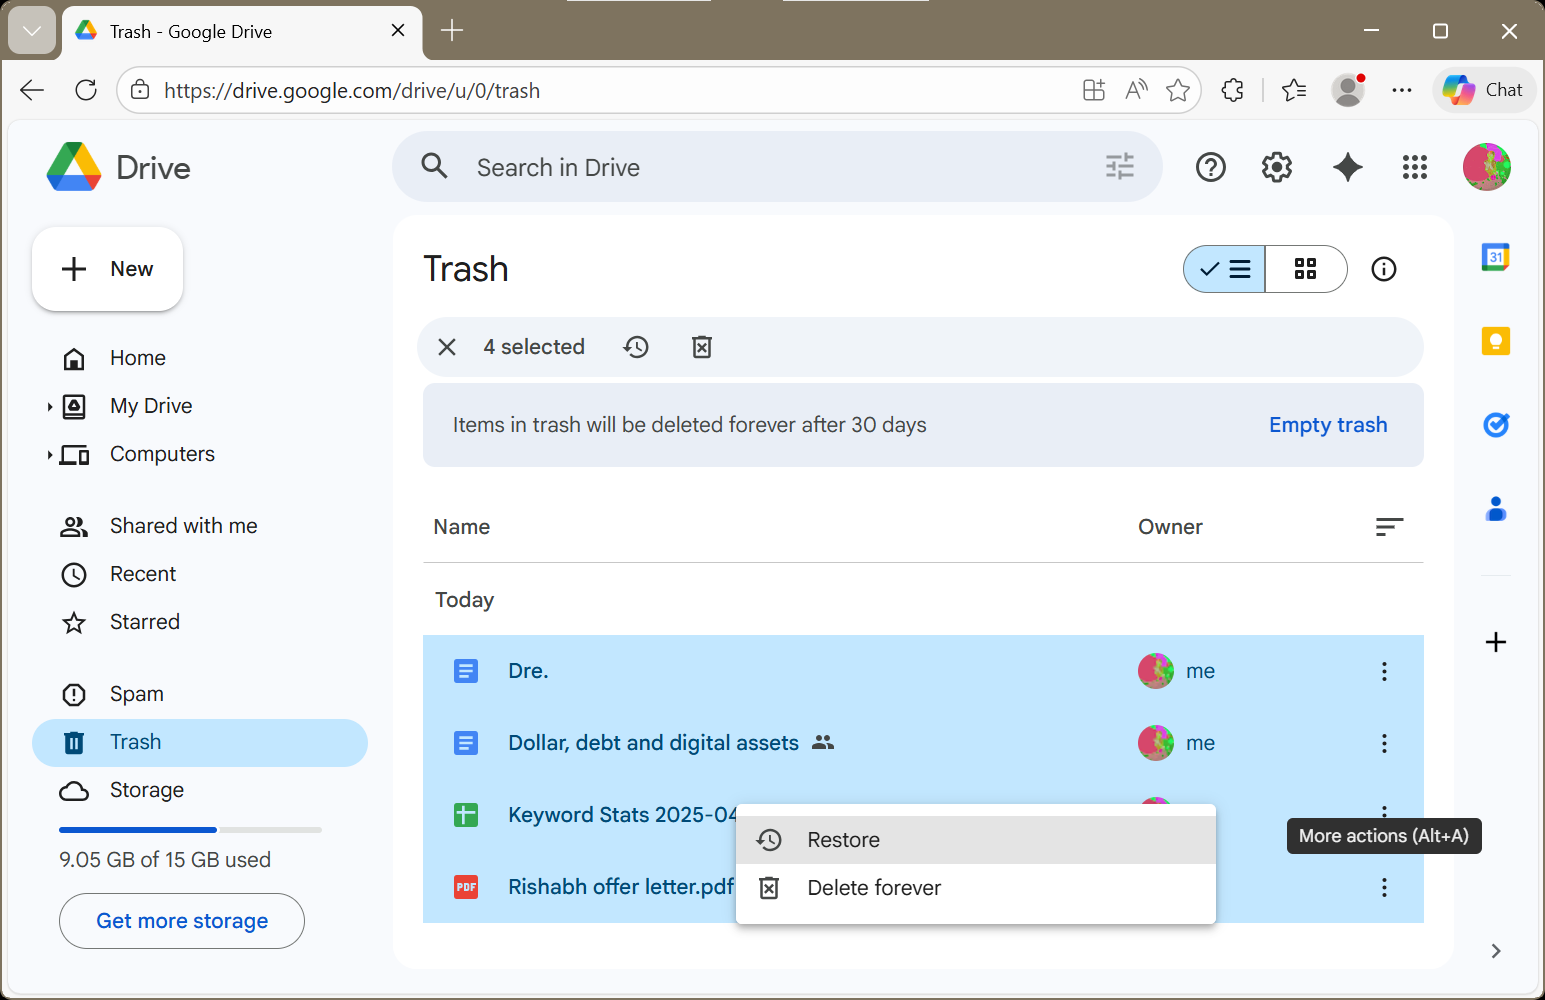
Cloud platforms like Google Drive and OneDrive feature a trash mechanism which is similar to Windows Recycle Bin. When you delete a file synced to the cloud, it is moved to this temporary location rather than being permanently erased. Note, however, that most of these platforms will automatically clear your files from Trash (for ex. Google Drive keeps deleted files for 30 days), so act accordingly.
Here’s we’ll show you how to recover files from Trash in Google Drive:
- Go to Google Drive storage and sign in with your credentials
- Click Trash in the left panel
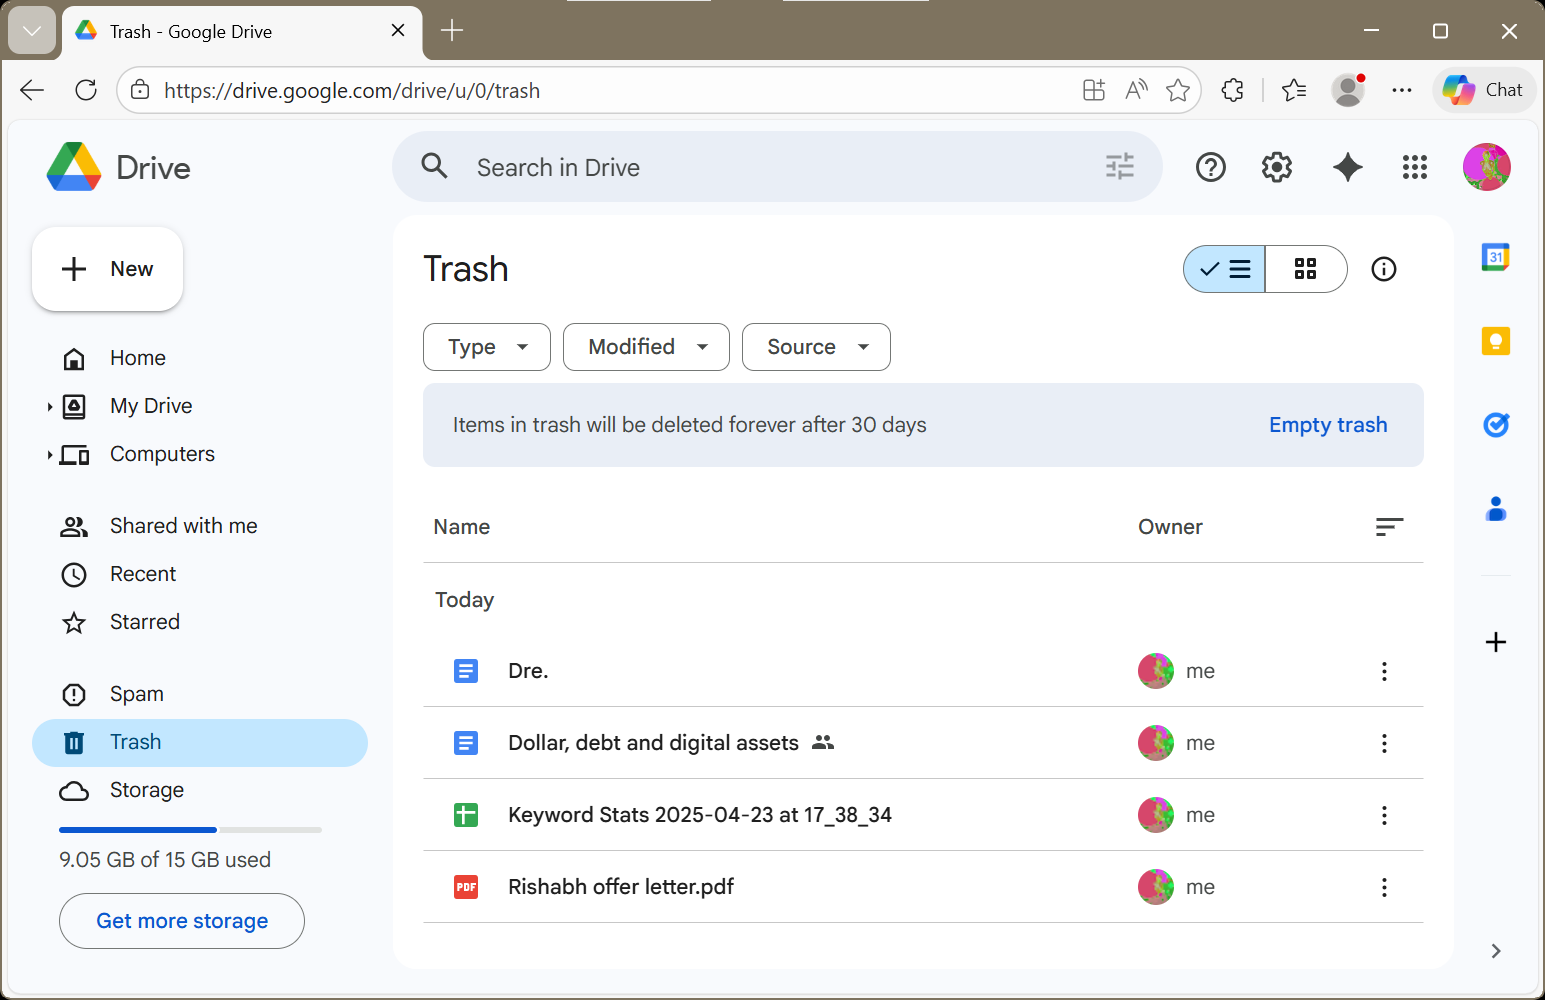
- Right-click the file you want to restore and click Restore
Method 6: Use Data Recovery Software
For permanently deleted files, data recovery software remains the most efficient and user-friendly solution. Our site analytics indicate that the majority of users reading this guide have already cleared their Recycle Bin and lack active backups. In these situations of accidental data loss, utilizing dedicated recovery tools isn't just the easiest route—it's typically the only viable choice you have left.
Stellar Data Recovery Professional helps you recover permanently deleted files, including docs, audio, photos, videos, and much more. It is compatible with all the standard Windows file systems—NTFS, FAT32, exFAT, ReFS, BTRFS, etc., and supports recovery from all types of storage devices.
- Launch Stellar Data Recovery Professional on your PC
- On the What to Recover screen, select the type of data you want to recover
- Click Next
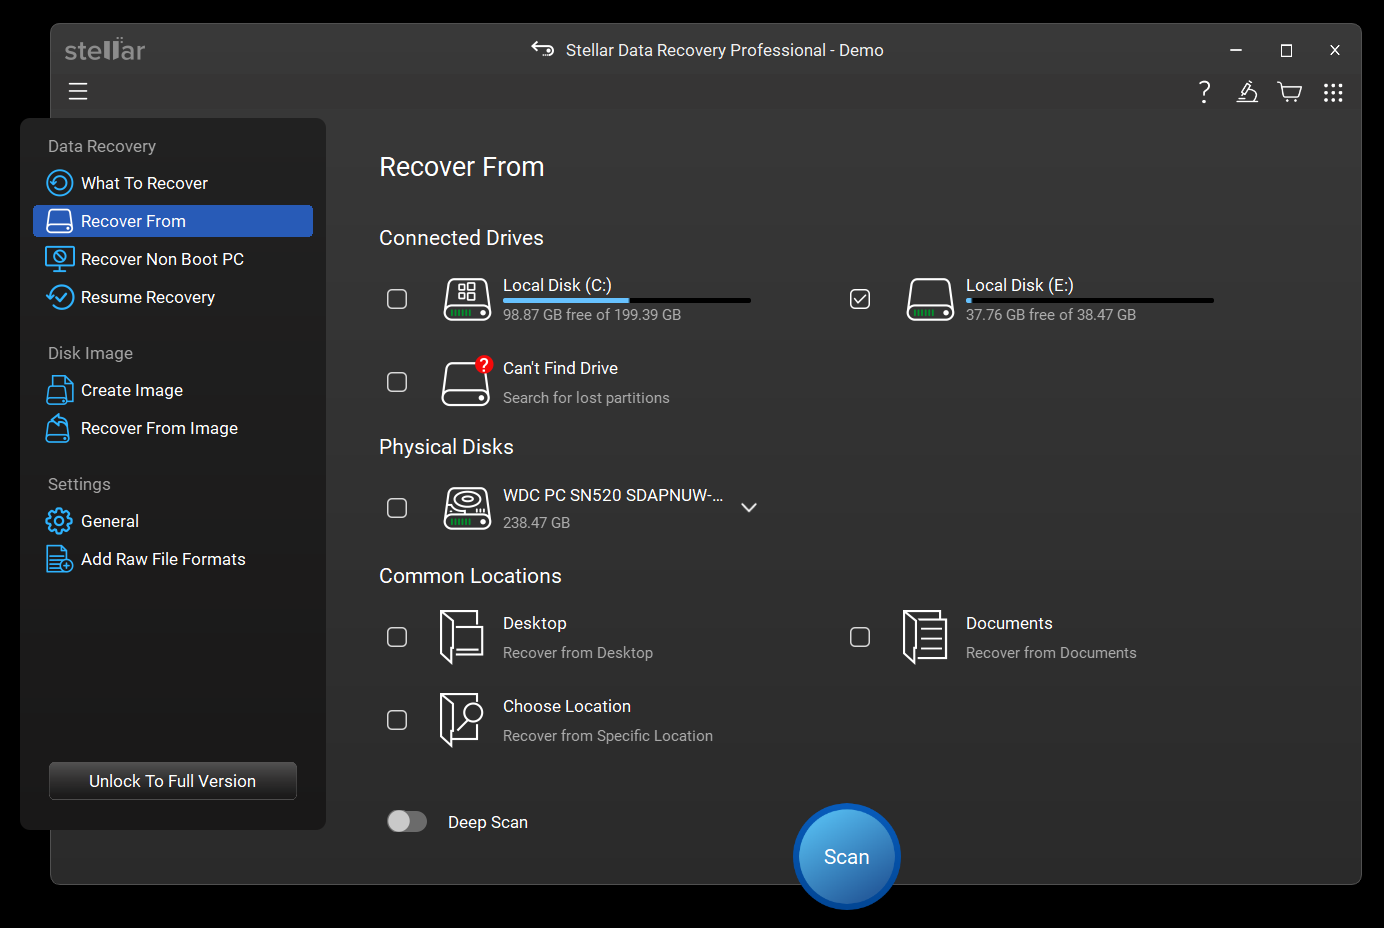
- On the Recover From screen, select the drive volume in which you want to search for lost files

- Click Scan. A screen displaying the scanning process will appear
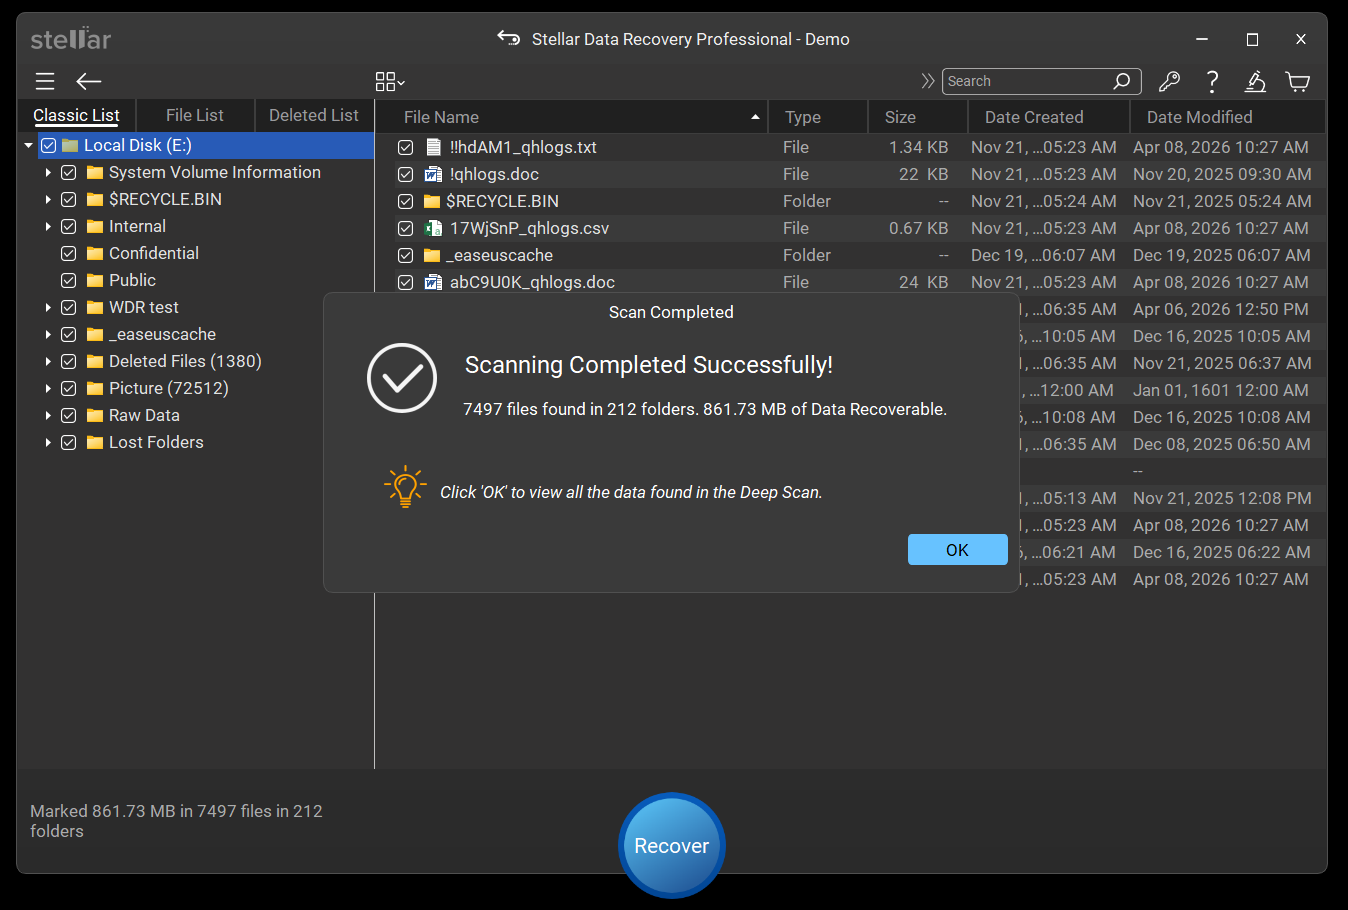
- Recovered files will be displayed for you to Preview
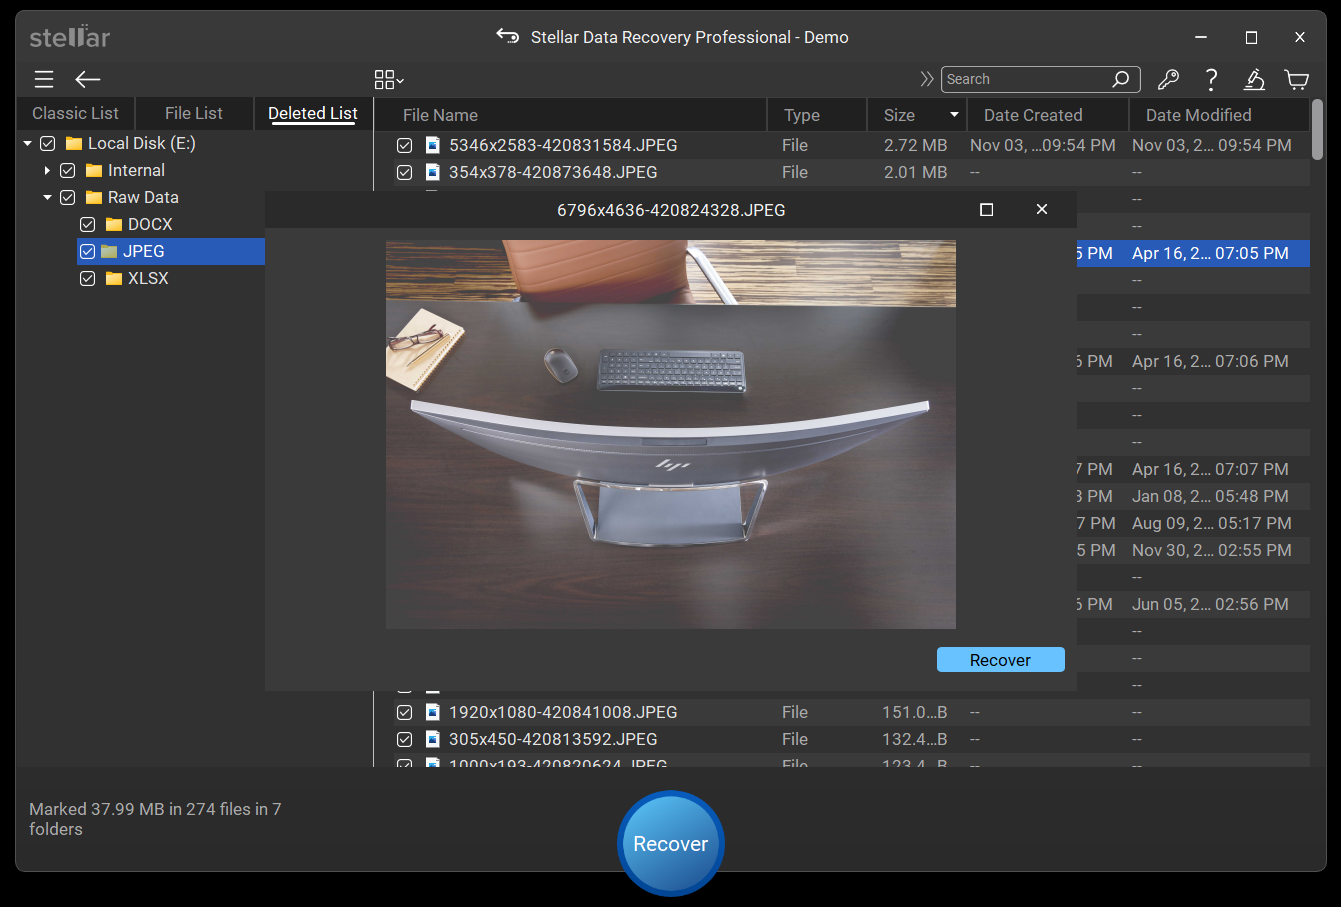
- Select the files you want to retrieve and click Recover to save them at a desired location
Bonus: Are Your Files Hidden or Corrupted?
Windows 11 has a few command-line tools that can fix underlying file system problems and sometimes bring back access to files that look like they’re gone – but aren’t really deleted. But these tools have limited application. If a file is permanently deleted (not hidden or corrupted) these tools won’t work.
Use CHKDSK
CHKDSK is a command-line tool for detecting & repairing file system corruption. It can repair file system errors and restore access to files that seem missing due to file system errors (not actually deleted).
- Open Command Prompt and Run as Administrator
- Type CHKDSK [volume]: and press Enter
- When you run CHKDSK on the system drive, Windows cannot scan it while it’s active. You’ll be prompted to schedule the scan at next restart—type Y and reboot
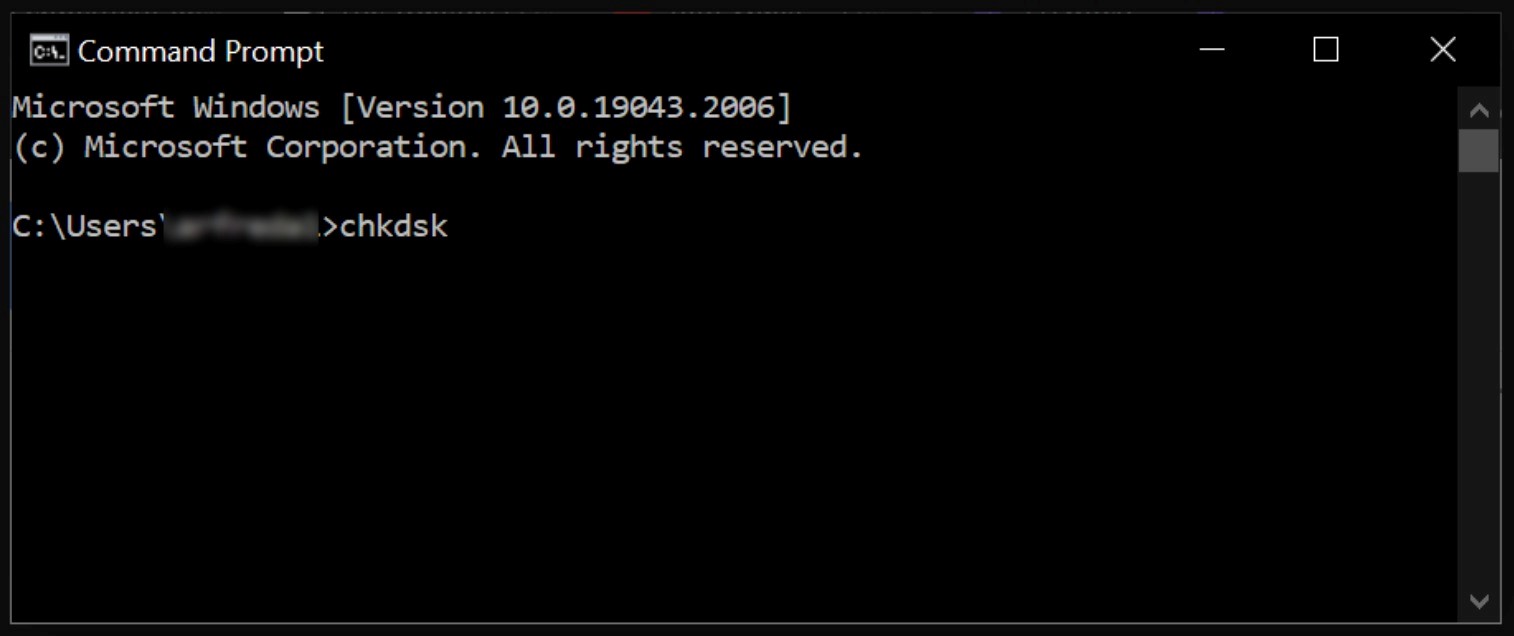
- If the scan detects errors, enter chkdsk [volume]: /r and press Enter to start an in-depth diagnostic scan and repair your storage drive
Use ATTRIB
Another tool called ATTRIB allows you to change file & folder attributes. It can help you access files hidden (not deleted) due to malware or system changes.
- Open Command Prompt and Run as Administrator
- Type attrib -h -r -s /s /d volume:\*.* (replace “volume” with your drive letter) and press Enter
Suggested read: How to recover data from a virus-infected PC?
Final Thoughts on Recovering Deleted Files in Windows
Permanently deleted files in Windows aren’t always gone for good. Whether you used Shift + Delete or emptied the Recycle Bin, recovery is possible as long as the data hasn’t been overwritten. This guide covers all working methods to recover deleted files in Windows, including built-in tools, backups, and data recovery software.
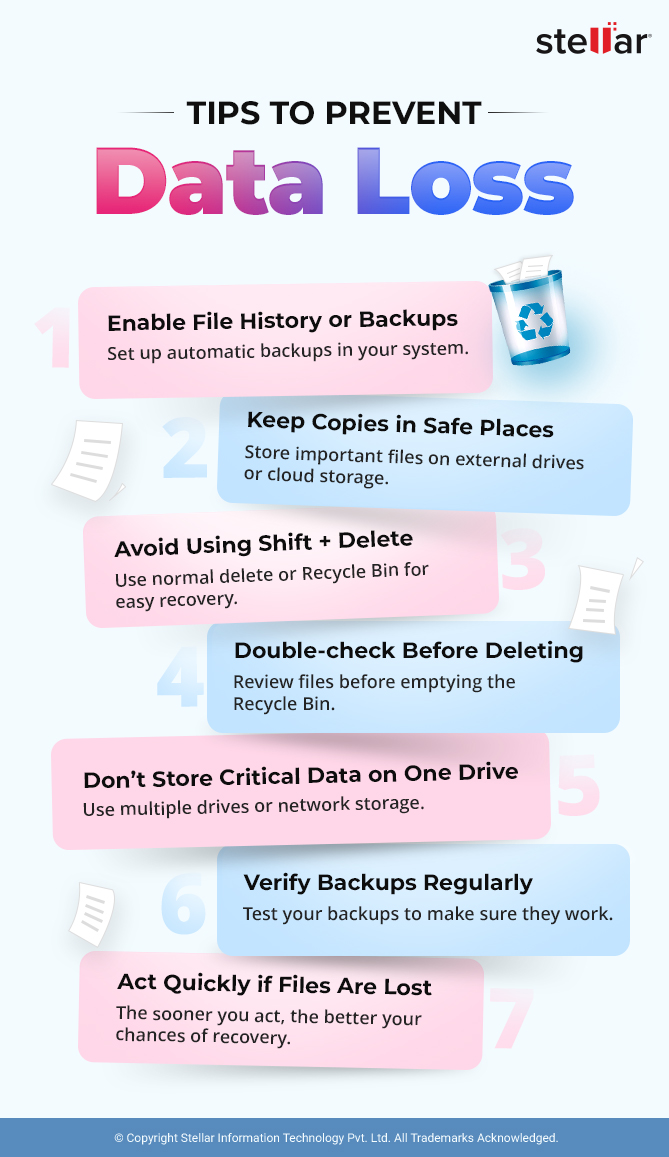
That said, the safest approach is to have data backups in place. Whether you use Windows tools or store copies on an external drive, having a backup means you won’t have to depend on recovery software – especially in cases where the original data has already been overwritten.
FAQs
Rishabh is a senior content specialist at Stellar Information Technology, where he writes about comprehensive data care solutions.
WHY STELLAR® IS GLOBAL LEADER
-
0M+
Customers
-
0+
Years of Excellence
-
0+
R&D Engineers
-
0+
Countries
-
0+
PARTNERS
-
0+
Awards Received


